1. Add a folder
Open PhotoFold and click Add Folder. Choose a folder on your Mac, a memory card, or a connected external drive. PhotoFold reads that location; it does not copy all its photos to your Mac at this point.
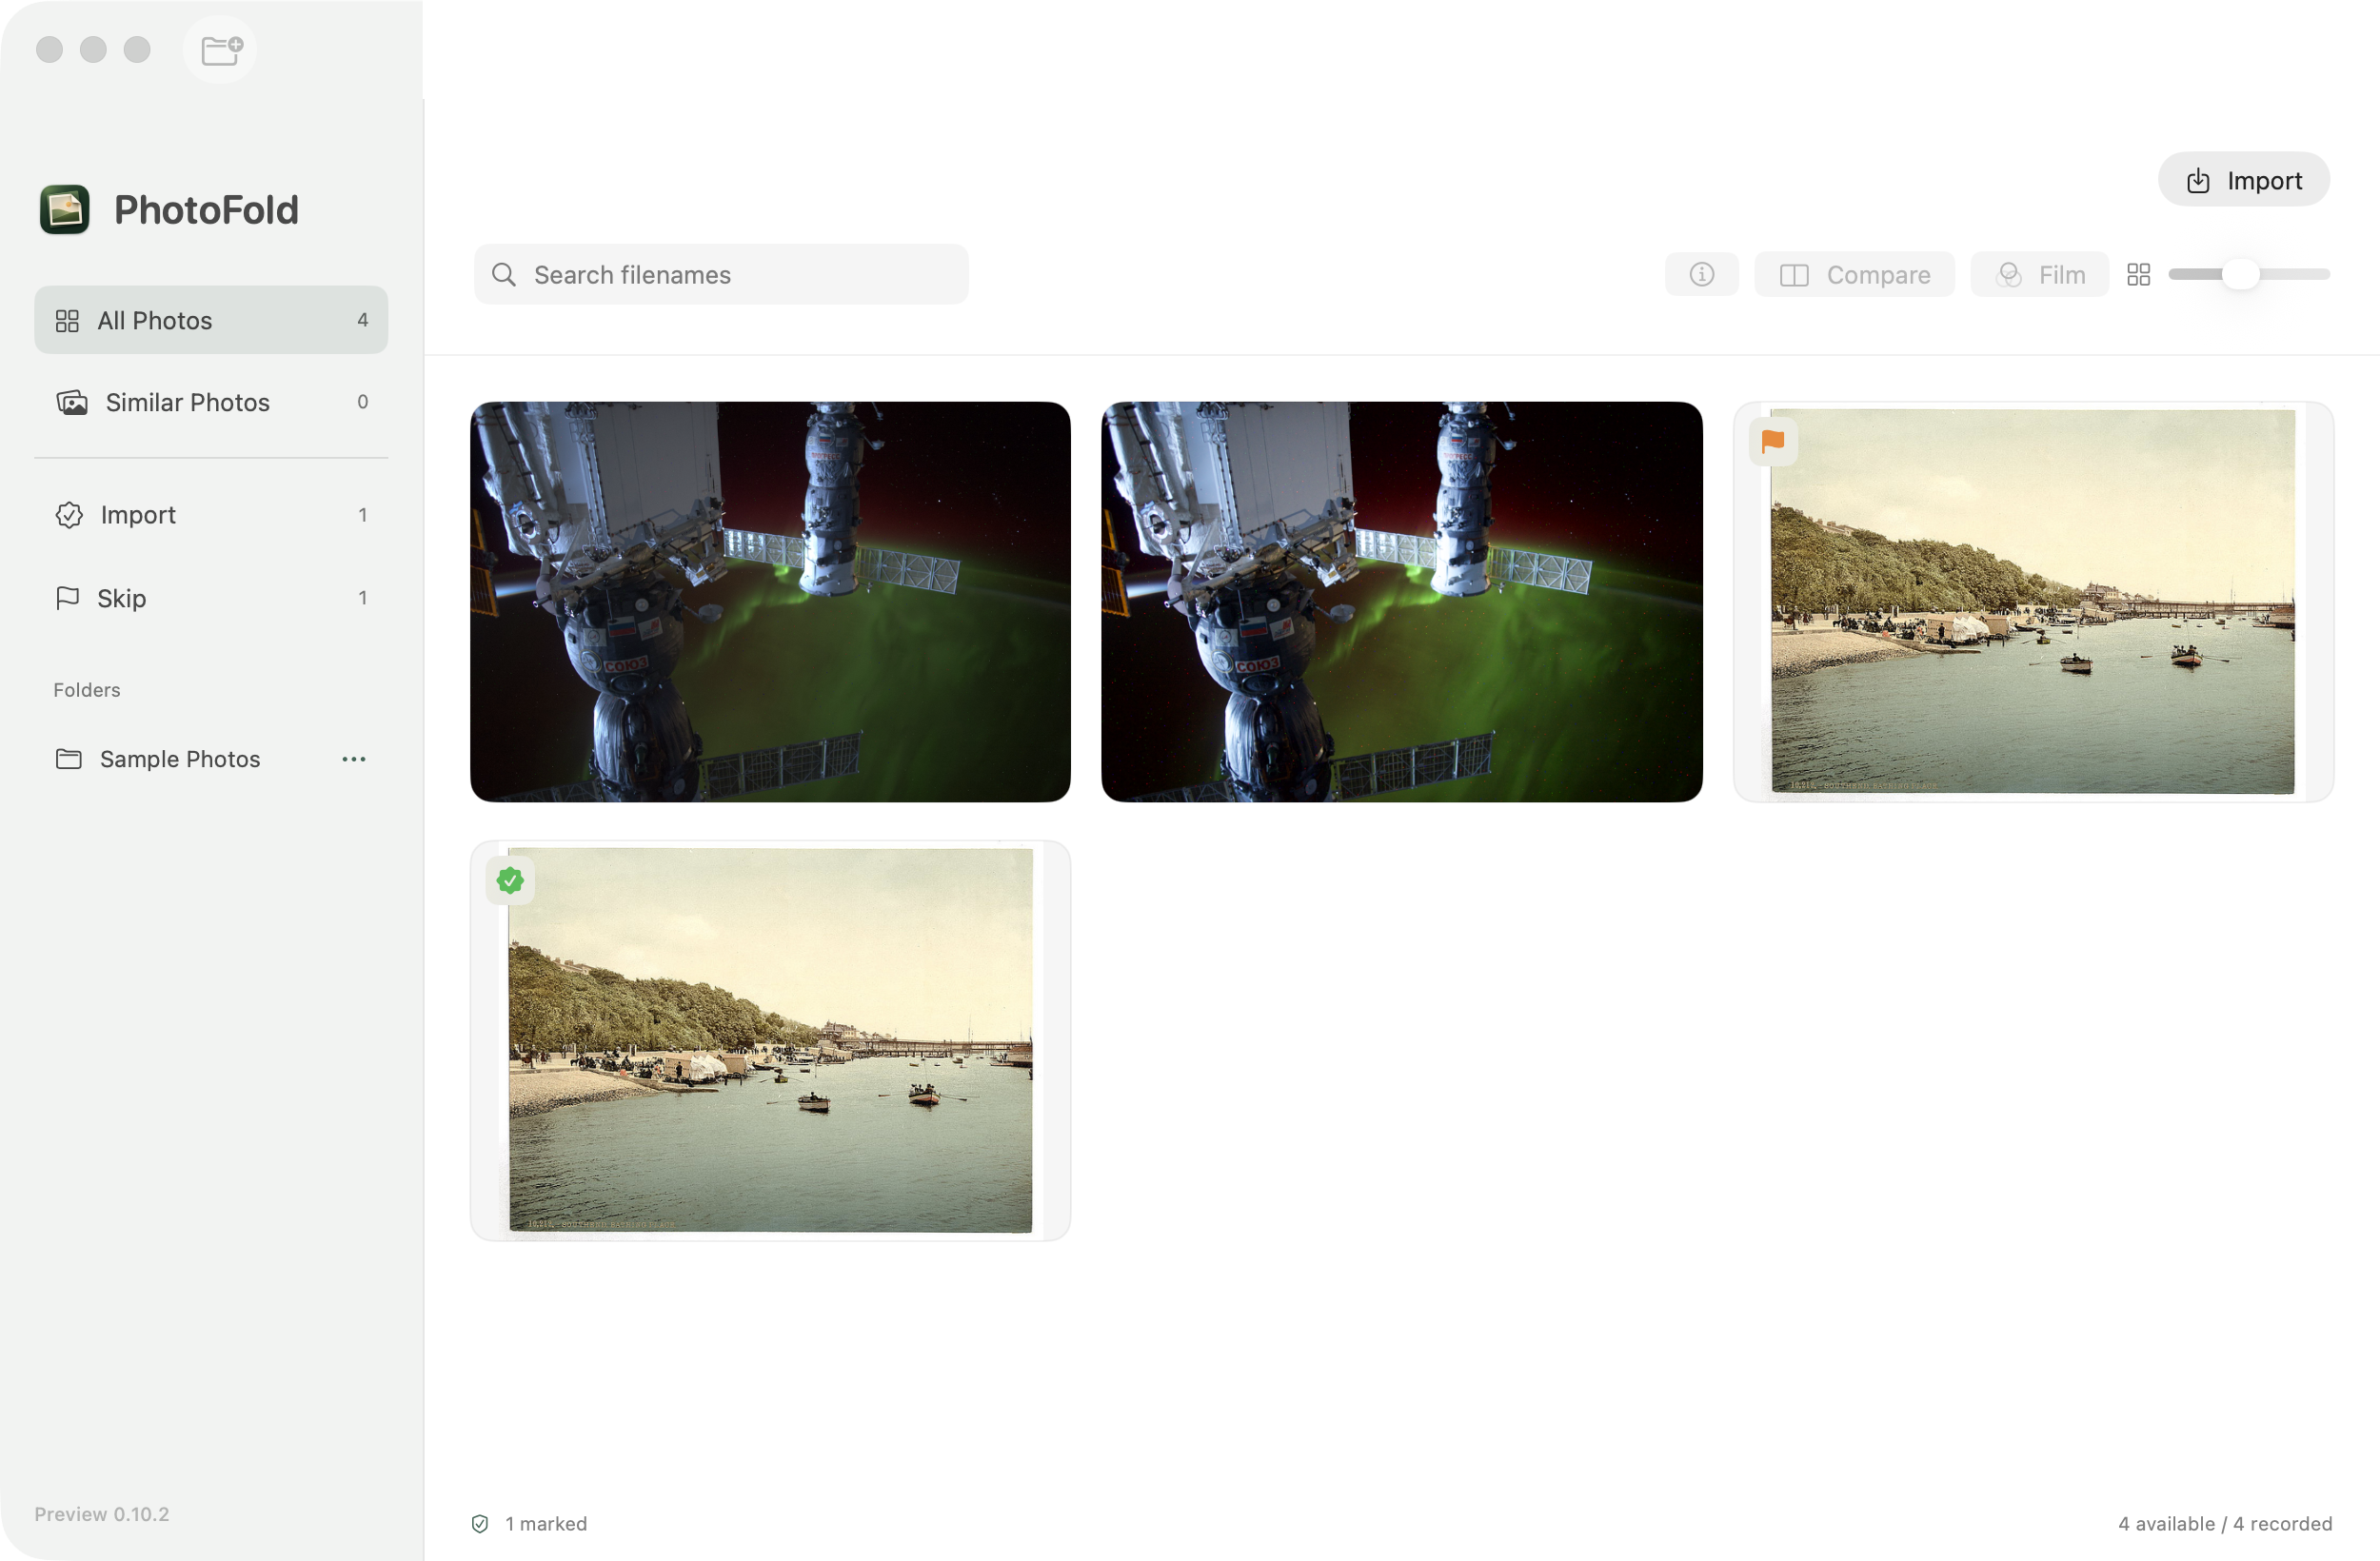
Use All Photos to browse available photos across your added folders, or click an individual folder in the sidebar to narrow the view. Keep external devices connected while reviewing and importing. A new-device prompt appears while the app is running; click Browse to choose the photo folder.
2. Find duplicates and similar photos
Open Similar Photos. In Find, choose Exact Copies, Near Duplicates, or Visual Similarity, then use Find Matches when needed. Changing the Find mode starts a scan.
Start with Balanced for non-exact matching. Try Strict if groups contain too many different pictures. Try Loose when you want more candidates and are willing to review broader groups. These are matching thresholds, not accuracy percentages.
Understand which matching mode to use →
3. Inspect the originals
Double-click a photo for full-screen viewing. Use the left and right arrow keys to move through photos, or move the pointer to a side to reveal navigation. Zoom in to examine focus and fine detail, then drag to inspect another part of the image. Press Escape to close.
For file information, select a photo and open Show Details using the info button, the context menu, or ⌘I. The details window is separate from the photo grid. Use its pencil control to rename a file; renaming changes the source filename on disk.
4. Mark Import or Skip
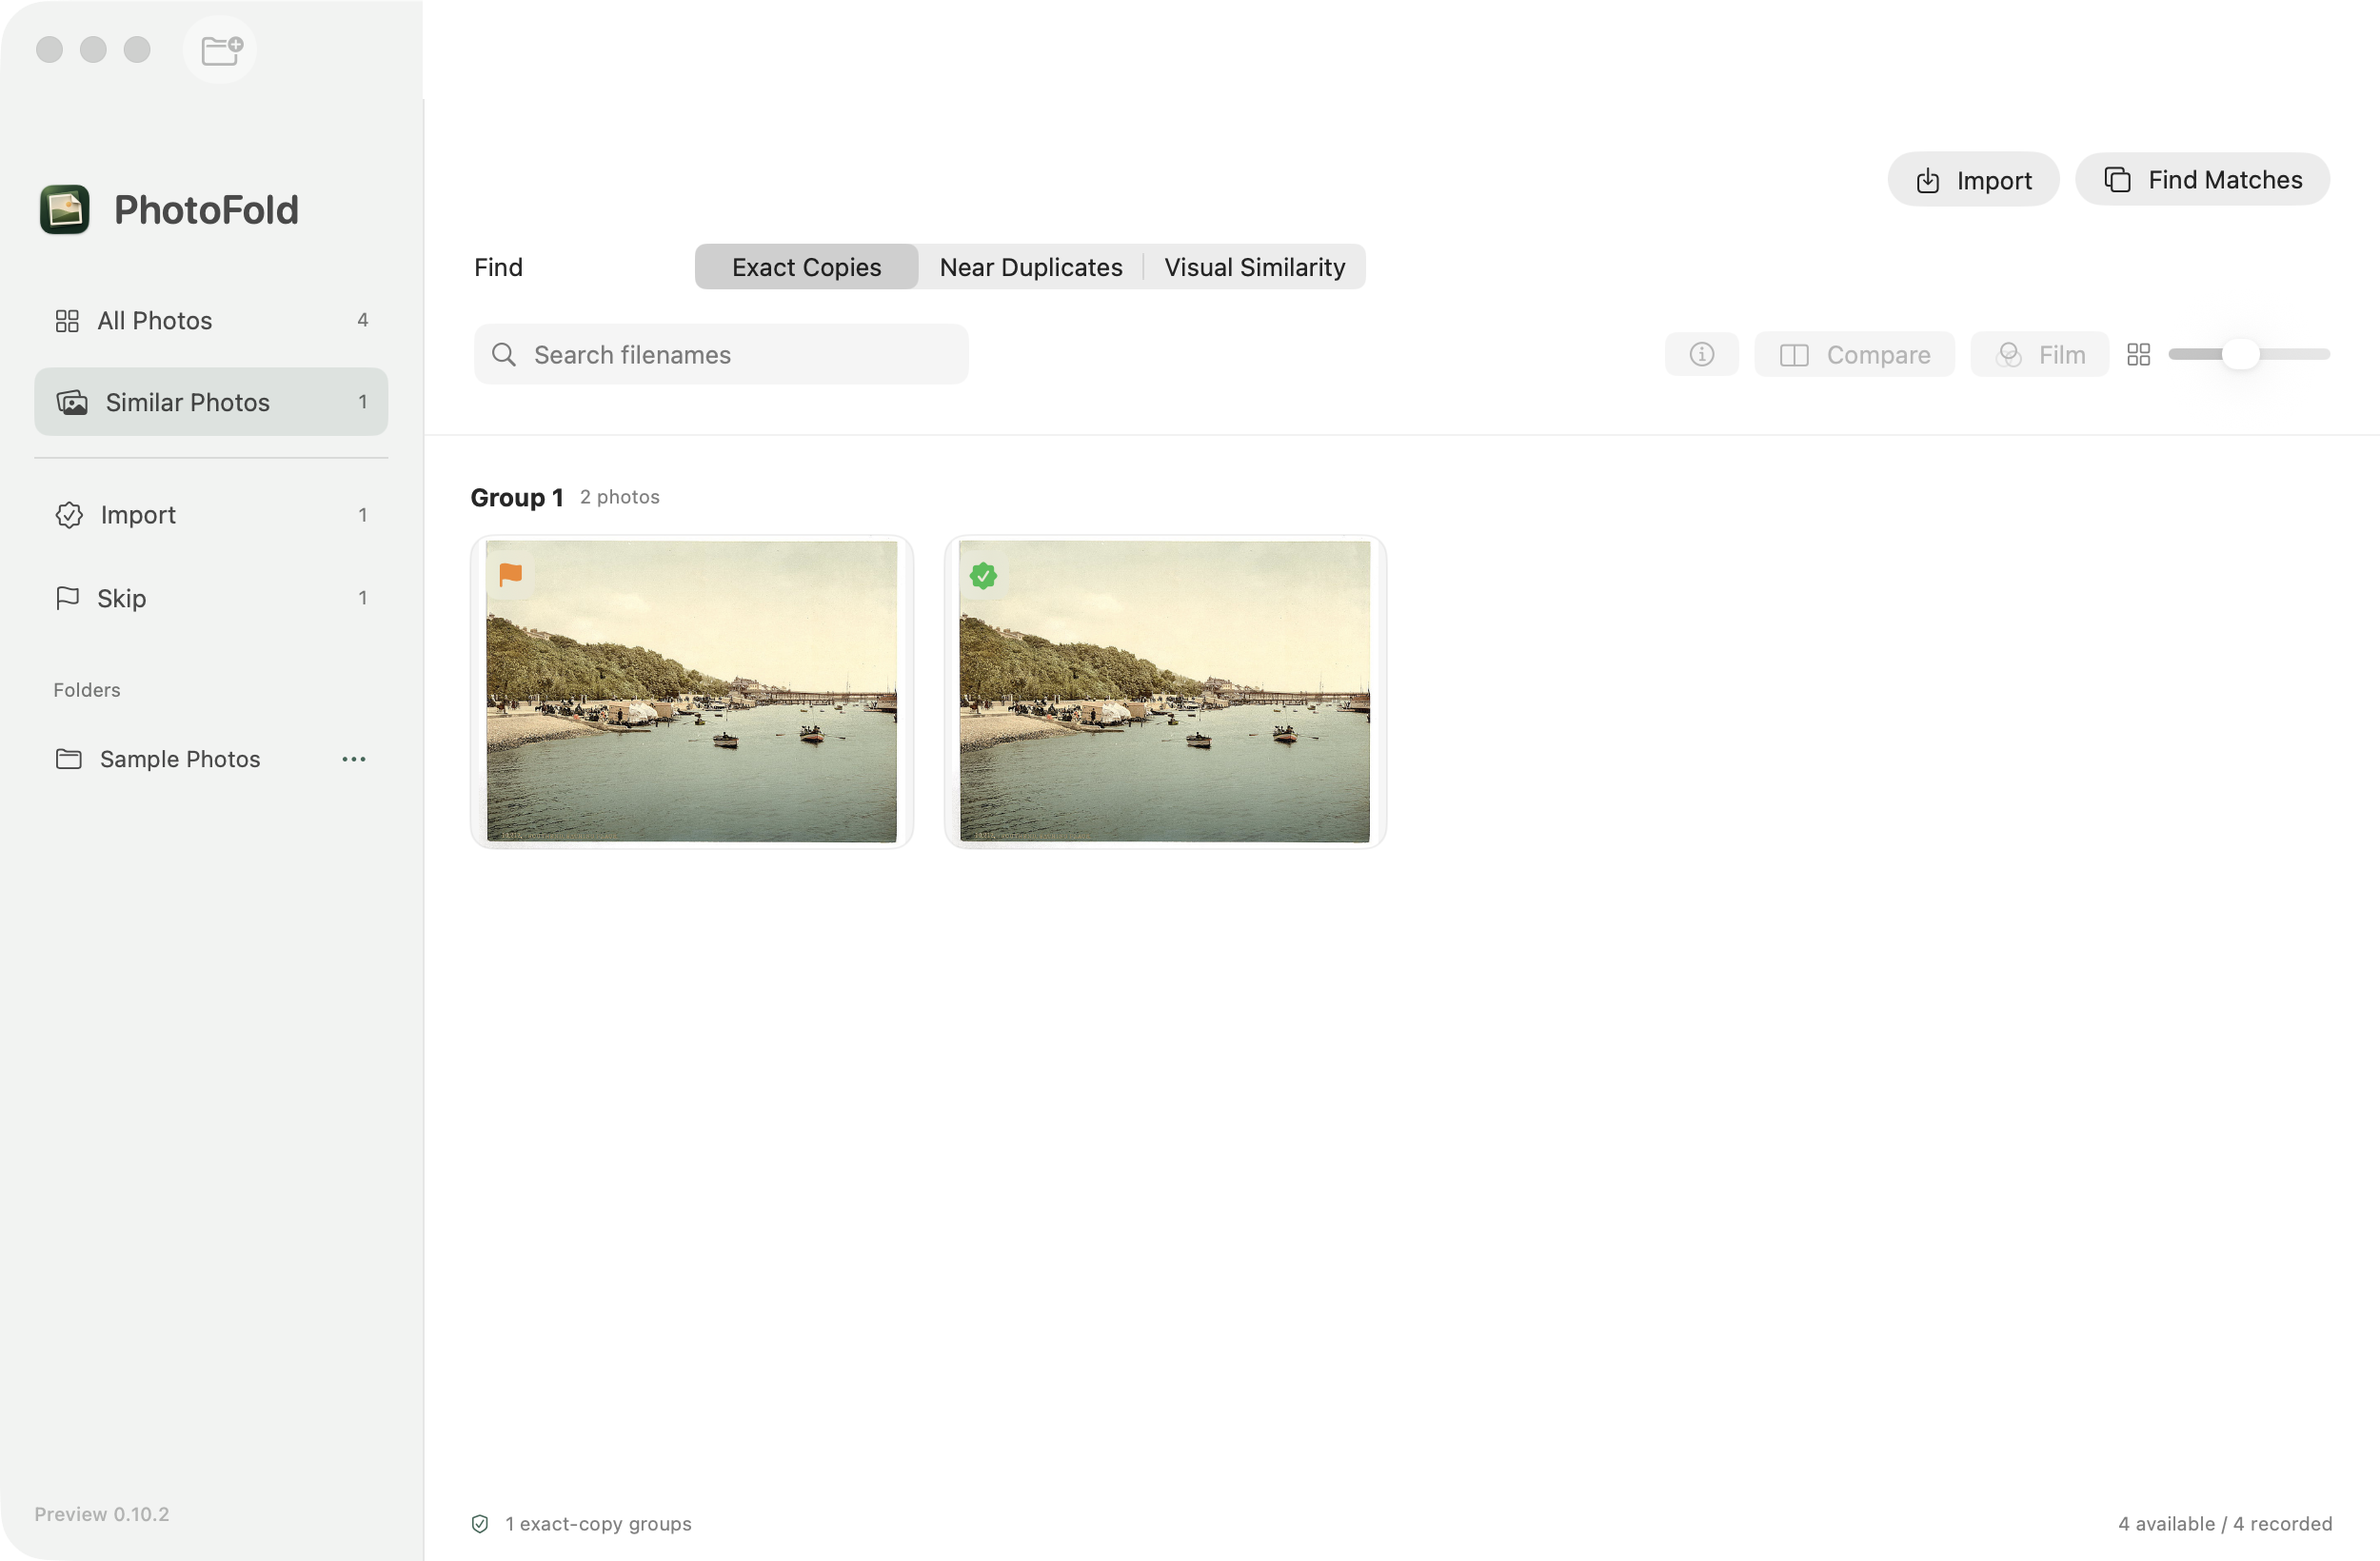
Select photos and choose Import or Skip from the review controls or context menu. Import and Skip in the sidebar filter those review decisions. The small badge at the upper left is the review mark; the upper-right indicator is the current selection.
Clear Choice deselects thumbnails. It does not clear their review marks. Skip excludes a source from import; it does not delete it.
5. Copy to your Mac
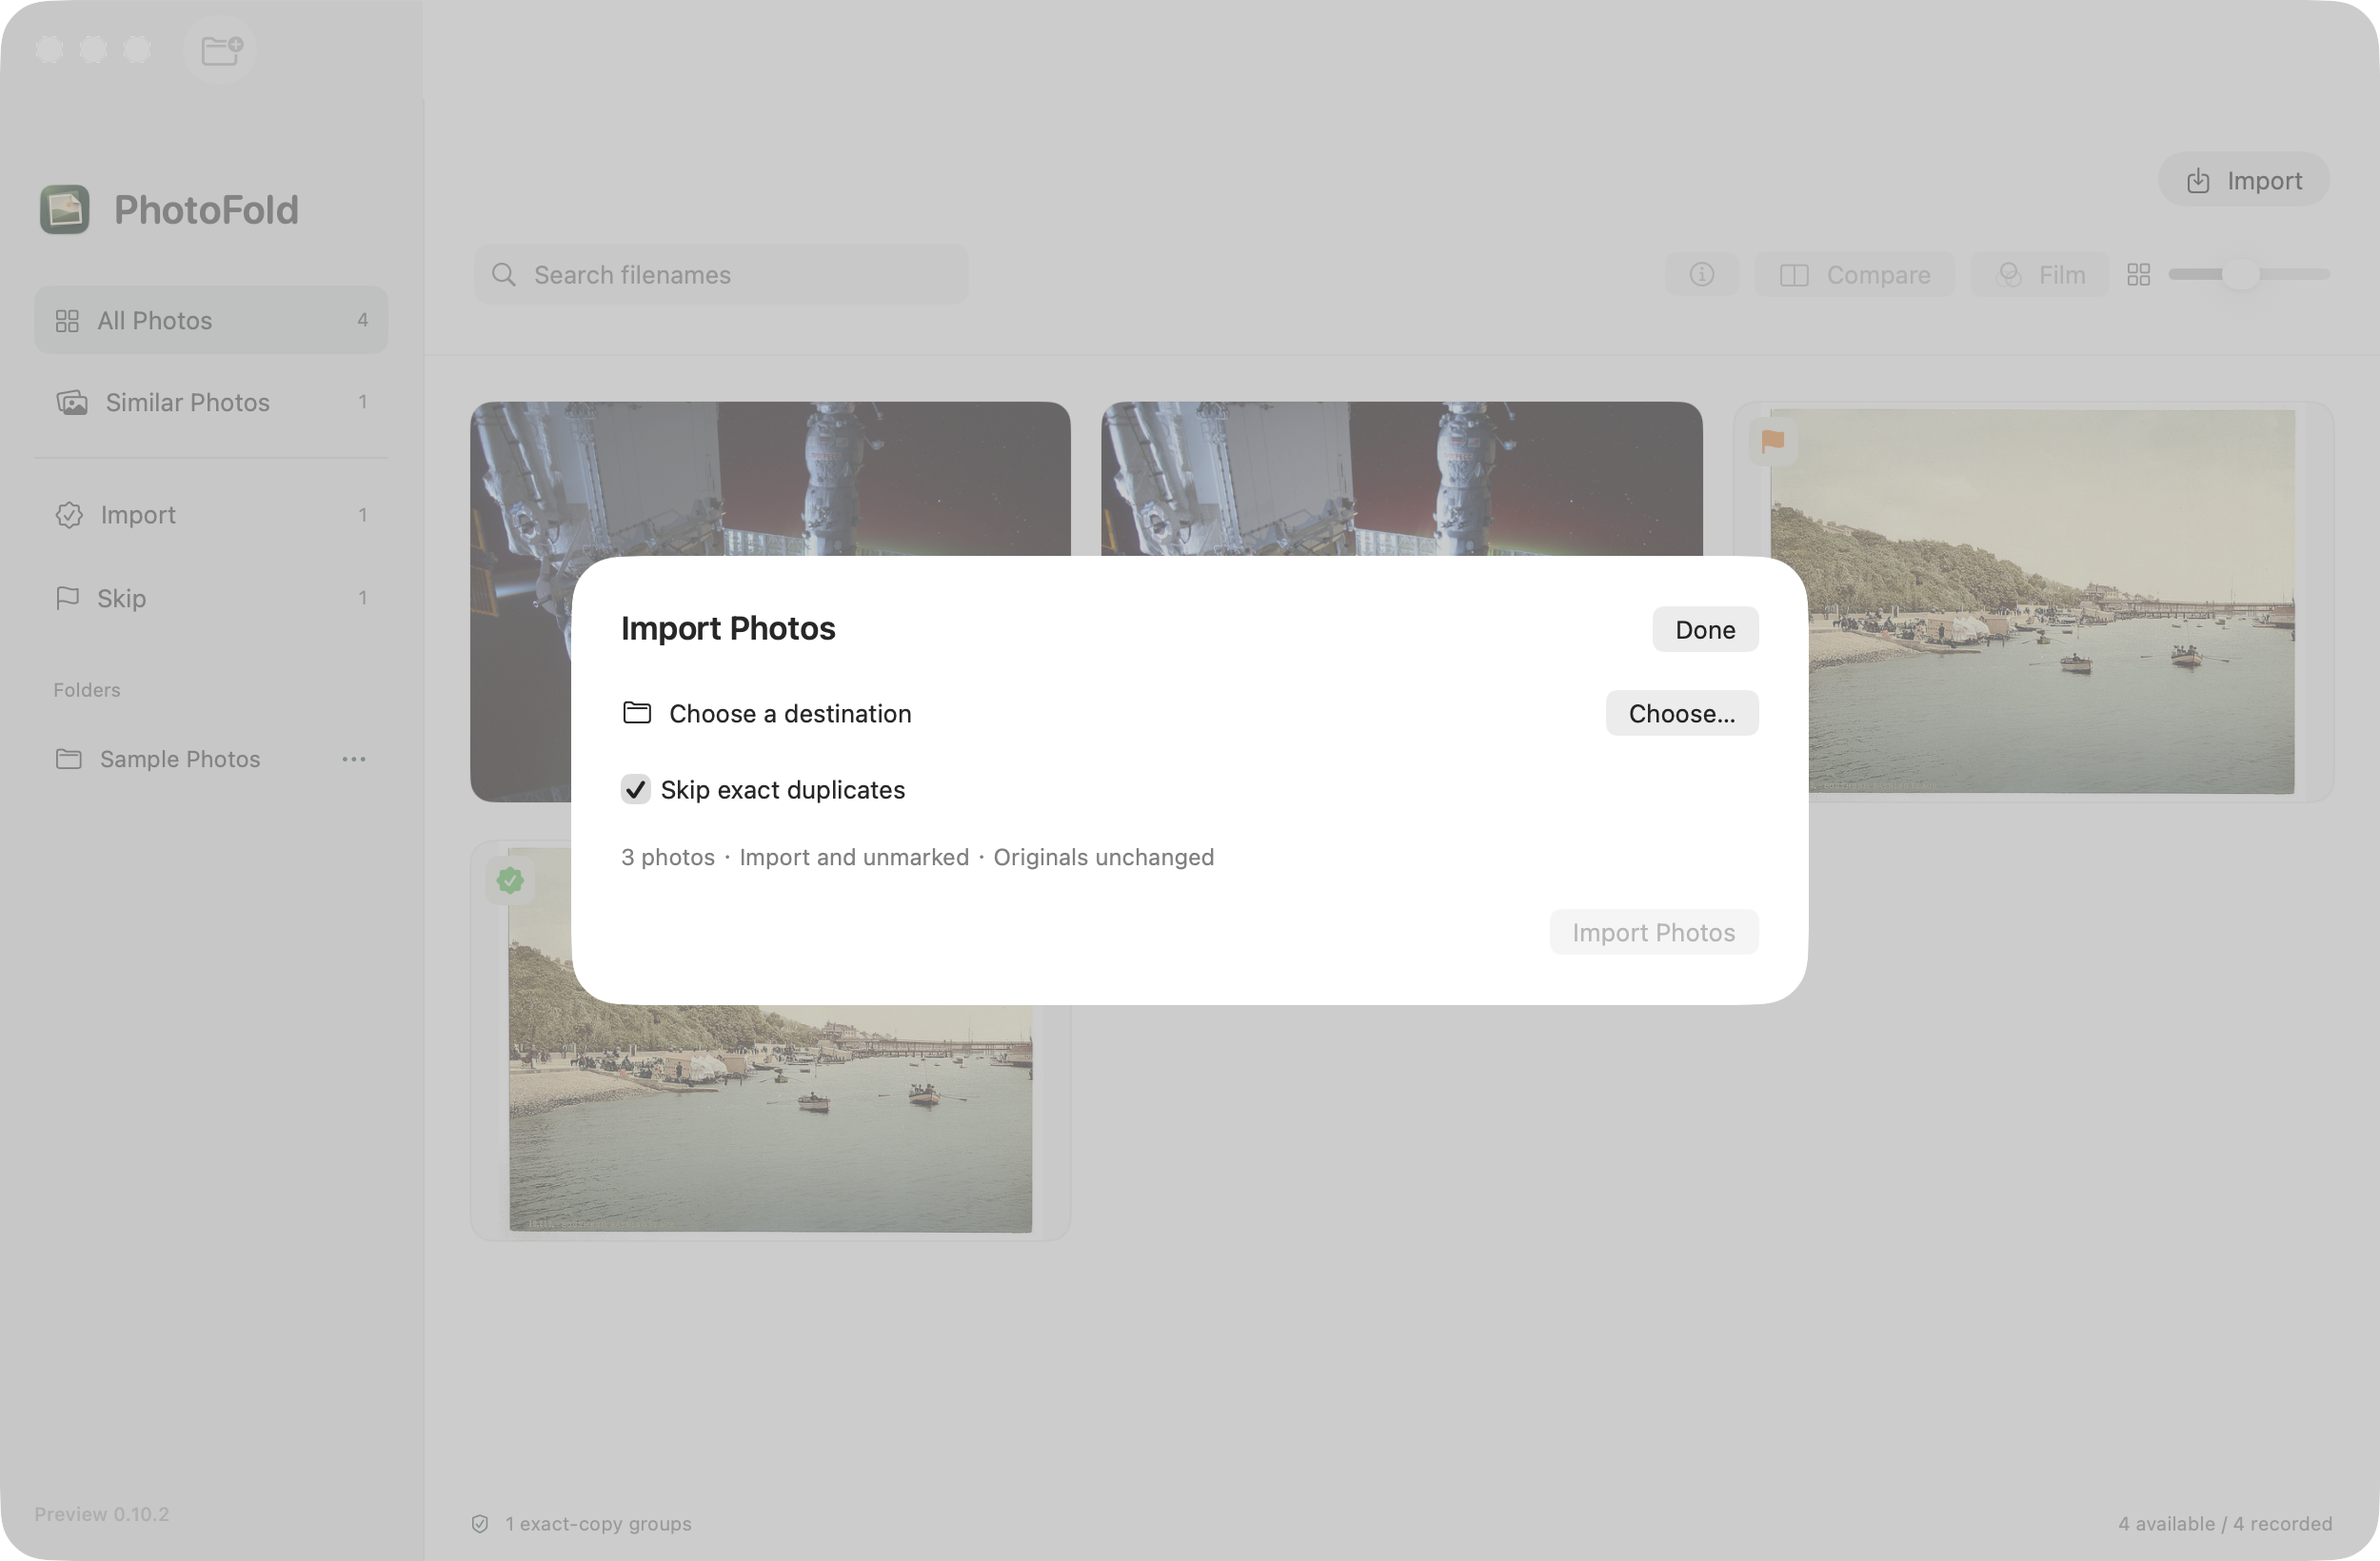
In All photos, click the main Import action. Choose a destination in the Import Photos dialog. Check the eligible count and the Skip exact duplicates option before copying.
Imports copy original files into a new output folder; they do not apply the film rendering or rewrite photo pixels. Wait for the copied / skipped / failed summary. Inspect any failure details and open the result in Finder. Check the copies before removing anything from the source device.
If something is unavailable
- Missing drive: reconnect it and confirm its files can be opened in Finder.
- Film is disabled: select exactly one available, supported RAW photo.
- No exact matches: a resized or re-saved image has different bytes; try Near Duplicates.
- Removing a folder: Remove From Library removes its entries from PhotoFold, not the source files.
PhotoFold currently works with folders, not direct Apple Photos, Lightroom or Capture One catalog integration.